|
|
|
Our maple syrup business was inspired by Bernard and Edith Marcoux who became our immediate friends when they moved into the Shelburne area. Bernard, from a many generation French Canadian family, could not resist setting up a small evaporator when he moved to his farm in Melancthon township from Quebec. Both Nancy and I were drawn into the act and it was not long before we too had tapped our first trees.
For the first few years we boiled the sap down using a 2' x 2' flat bottomed square pan laid over a home welded fire box. All this apparatus was housed in a shed on runners that I had constructed of old barn board, recycled windows, and steel sheeting. The runners, 2" x 10" s, were used because this little shed had a dual purpose. In the early spring it served as a sugar shack but eventually was dragged out to the field to serve as a calf shelter for the new born calves. Fine, in practice, as long as the calf shelter was not left frozen to the ground out in the calving field instead of being moved to the farmstead in the Fall!
|
|
|
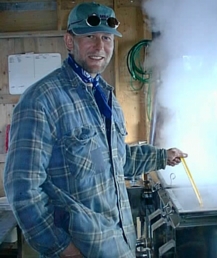
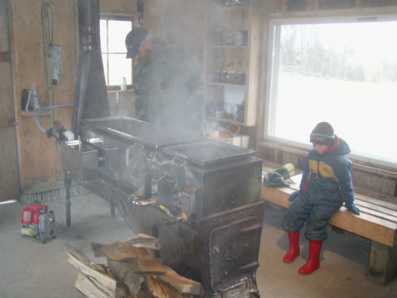
It was a fine little shack albeit a little drafty on cold winter nights even with the stove stoked to a cherry red. It's no wonder there were a few close calls with fire. One in particular occurred during a much too enthusiastic newspaper read. The paper had blocked my view of the evaporator and when I put it down I saw that the entire opposite wooden wall was a sheet of flame. The old dry barn boards had reached their critical temperature and were now ablaze. There was a moment's hesitation as I reached for the pail of sap - you have to experience collecting sap in more than knee deep snow to appreciate why the reaction was not immediate - to douse the flames. All was saved though, and we learned to wet down the boards each evening.
|
|
|
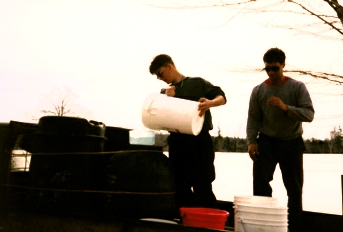
The large flat pan made it very difficult to bring the sap to the stage of high quality maple syrup. So even in the early years we would boil down about 50 gallons of sap until it was at a depth of 3 inches in the big pan. We then transferred this syrup to our garage at the house where pots on a Coleman stove were boiled until the correct temperature was reached. I can remember my Uncle John boiling in his kitchen one winter while my Aunt was away on vacation !!!!! Indoor boiling was not an option to be considered.! Once the syrup was ready we transported it to the kitchen to be filtered and bottled using a stainless steel milk pail. A full pail of syrup does get a little heavy after a short walk up hill.
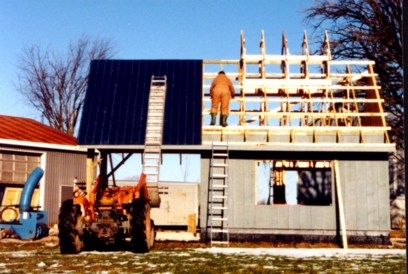
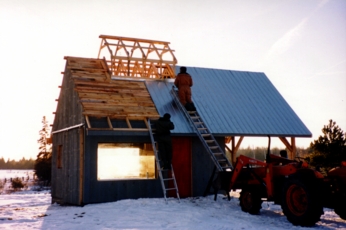
The sugar shack/calf shed served for many years but eventually it had reached the end of its useful life. We were at a cross road and, like many farmers who always look at the light at the end of the tunnel, decided that bigger was better. We began looking at something better than a flat pan evaporator and eventually purchased a small evaporator, $2475, from Les Entreprises Denis Darveau Inc of Ham-Nord, Quebec. Now that we had the evaporator we needed a new sugar shack to contain it. After picking the brains of a number of our friends in the business [most notably Don and Margaret Badger of Knowlton, Quebec,] I began to draw up some plans.
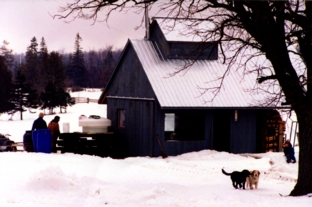
A concrete base that had originally been used as a feeding area for the cattle already existed just across from our workshop, close to water and hydro, the necessities of a modern, comfortable sugar shack. Work began in the Fall of '97 with the pouring of a flat floor over the existing concrete pad along with 5 inch concrete bases for the walls. Two large windows, originally patio doors, were scrounged from a local window shop to provide a good view and lots of light. The Badgers had suggested that we should have a wood ceiling to reduce the condensation and we were lucky to find just the right amount of tongue and groove wood from Liz and Brad. I wanted a steep roof so decided on a 45 degree slope, an angle that also made the best use of the plywood sheathing that we lined the shack with to prevent drafts. The only really tricky part, tricky for those of us who are not so enthusiastic about heights, was the very top of the shack where the roof vents were located. That little bit of steel roofing was not a pleasant experience. The shack was completed in time for the grand opening in February '98. The total cost, materials, was $2,800 for the building + $2,600 for the evaporator = $5,400.
 |
 |
 |
 |
 |
 |
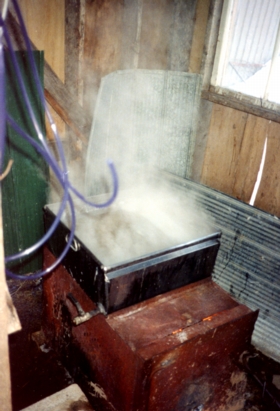
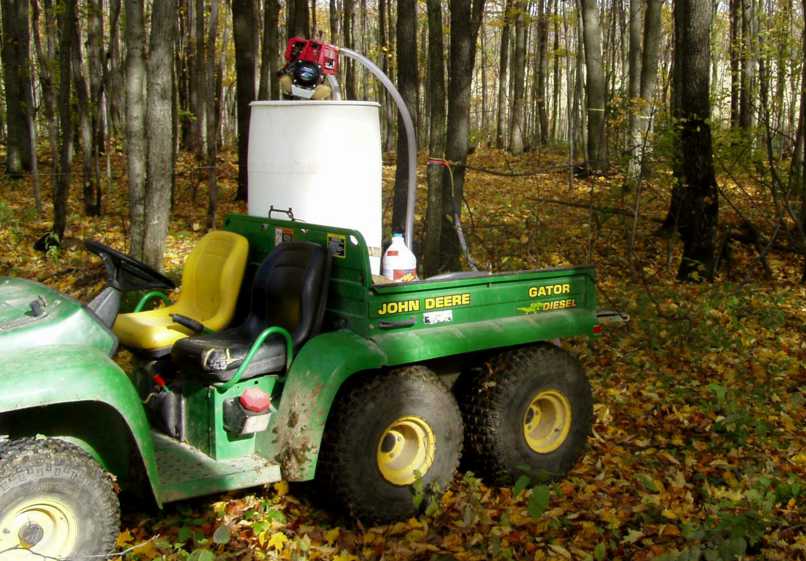
Our new evaporator was made to handle 200 taps but that was nearly what we were doing using the old flat bottom pan so we knew we could press the envelope a little. The first year of operation, 1998, we had 125 taps on our own farm and Pierre tapped his bush as well. The difference in efficiency was remarkable. The fluted pan gave ever so much more surface area to the fire probably equivalent to 3 or 4 times that of our previous flat pan. The wood consumption was also much less per litre of syrup produced. Not so much unused heat just escaping up the chimney. The quality of the syrup also increased due to the faster boil and the closed gravity system. You can see how this works from the picture above where we fill the outside tank that flows directly into the evaporator. This flow is controlled by a check valve. One early morning when Nancy went out to check the fire she accidentally flipped off the check valve. Now freezing cold sap was overflowing onto the floor as she was desperately trying to reseat the float valve with her bare hands. Needless to say, it did not take too long after that to introduce a shut off valve just before the float valve of the evaporator.
In the following years, Pierre's sap was augmented with sap from Anne Marie Roussy who brought her surplus to us for custom boiling. In the Spring of 2000 our little evaporator produced more than 400 litres of syrup.! One good tap should produce 1 litre of syrup so now we were at double the assigned capacity of our evaporator!
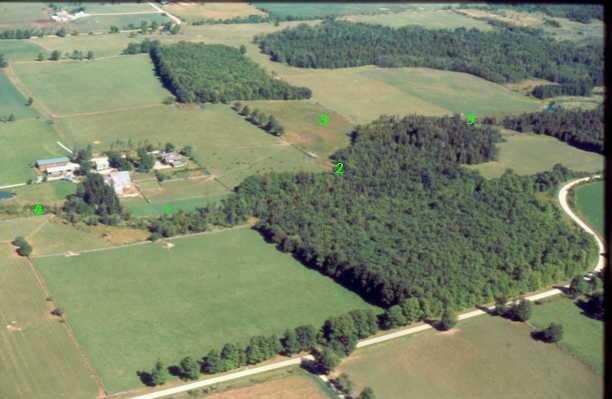
 Glen Osprey Farm has
a high percentage of the land covered in forest. Some of this
forested land is wet producing only poplar, cedars, and spruce,
but some of our forests are good maple bush. In consultation
with Pete Williams,
our forester, we have decided to dedicate two of our maple bushes
to maple syrup production. The other maple bush lots are being
used for log production and are subject to a different forest
management program.
Glen Osprey Farm has
a high percentage of the land covered in forest. Some of this
forested land is wet producing only poplar, cedars, and spruce,
but some of our forests are good maple bush. In consultation
with Pete Williams,
our forester, we have decided to dedicate two of our maple bushes
to maple syrup production. The other maple bush lots are being
used for log production and are subject to a different forest
management program.
In our maple syrup bush, the trees need to produce a good wide crown to present as many leaves as possible to the summer sun , rather than the small crown and the long straight trunk of the lumber trees. This spring's sap is produced by last years photosynthesis. The tree stores sugars in it roots to take it through the winter and support leaf bud in the spring. That stored energy in the form of sugar dissolved in the sap is what we tap.
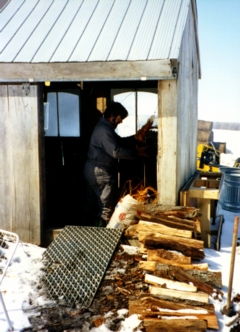
Pete marked the trees in 1998 and four years of chainsaw work has not yet completed the entire project. And in a couple of years it will be time to repeat the process as sylvaculture is measured in decades. Even so, we have been able to provide enough fire wood to power our evaporator,our home, and the homes of a number of the Marcoux clan! A huge amount of renewable energy! Most of the trees that were not maple have now been cut, but we have decided to tap the small marked maples rather than cut them down immediately. These taps are not very productive but using them now allows the good maples to grow for a few more years without the stress of tapping.
 |
 |
 |
 |
 |
 |
 |
The use of a propane finishing pan not only increases our daily sap production but also ensures an accurate batch brix measurement. |
 |
 |
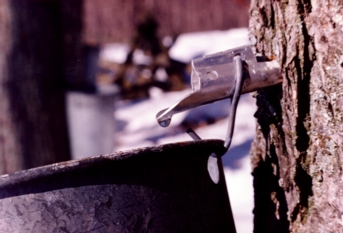
Maple syrup production has come a long way from our first attempts at producing maple syrup in the old calf creep. Many of our management practices in the beginning did not conform to what are now considered to be acceptable, especially in regard to lead contamination. This included galvanized pails and our original evaporating pan that was no doubt lead soldered. However, we were unpleasantly surprised to find, a few short years ago, that our finishing pan was lead soldered. We had always believed that the solder used in the pan was not lead but the OMAF inspector's lead test kit quickly proved that lead was present. Fortunately, our syrup was tested to be free of lead, probably because of the short period the syrup was exposed as well as the fact that the lead soldered seams naturally build up a protective cover. It appears that the major sites of lead contamination are those containers where the sap is exposed for long periods of time. Our collection barrels and sap tank are food grade plastic, the evaporator was a stainless, TIG welded, unit and there was no sense in having one weak link in the production chain. We immediately purchased a new finishing pan, this time stainless and TIG welded!
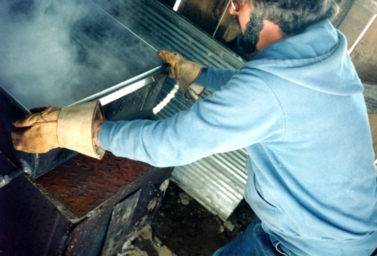
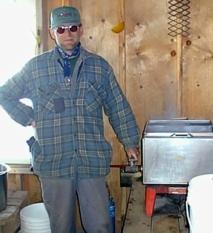
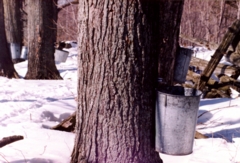
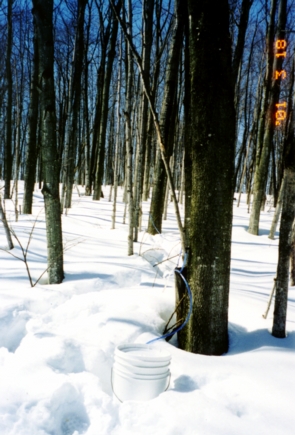
The sap is collected in the morning and again in the late afternoon. A small Honda pump is used to move the sap from the collection barrels to the holding tank beside the shack. This holding tank is elevated above the evaporator ensuring a constant flow of sap to the pan. With a good fire, there is a constant trickle of fresh sap entering the large tank of the evaporator. The large tank is divided in half longitudinally and, to ensure that the cold sap does not reduce the boil, it flows through a stainless tube to the far end of the opposite half (section a in the diagram). A second smaller flat bottomed tank sits just above the fire box. This tank is also divided in half and connected by an external pipe to the main tank. Long handled plugs are supplied to stop the flow between the large and small tanks. Once we have a good boil going we can draw off the syrup from the far end of the evaporator.
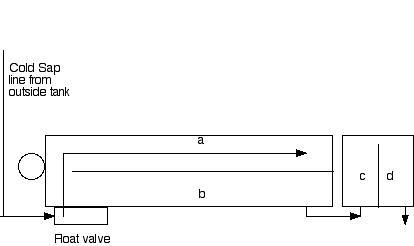
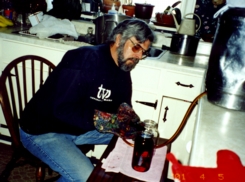
The syrup becomes more concentrated as it moves from the far end of section "a" through section "b" then into the small tank "c" and finally is at its most concentrated in section "d". The evaporator can be used to produce the correct concentration, 66 brix, but we have found that the operation runs more smoothly if we do the final finishing in the propane pan. We normally draw off the syrup from section "d" when the brix content is around 50. In the picture above, Martin is about to check the syrup in section "d" to see if it is ready to transfer to the propane pan.
 When the
syrup in the propane pan is ready, that is we have the correct
brix concentration and a volume of about 15 litres, we drain the
syrup into a pail and transfer it to the kitchen for bottling.
When the
syrup in the propane pan is ready, that is we have the correct
brix concentration and a volume of about 15 litres, we drain the
syrup into a pail and transfer it to the kitchen for bottling.
In the kitchen we again take a brix reading with the refractometer. The refractometer is used in the sugar shack but it is very sensitive to temperature. For an accurate brix reading, the refractometer must be at close to 20 degrees Celsius and this temperature can only be accomplished with any degree of certainty in the kitchen.
Just prior to bottling we bring the syrup just up to the boil again and transfer it to the filter canister. This is the tricky part, sticky too if the pourer misses the filter. As you can see from the picture to the left, the syrup drains out of the canister through a plastic tube. This tube is secured to the canister with a heavy duty elastic, the ones used to castrate lambs. Don't worry we always use a fresh one! The glass bottles and their lids have been heated in the oven to 110 degrees, the same level as the hot syrup so the process is much like the canning of any food product.
 |
 |
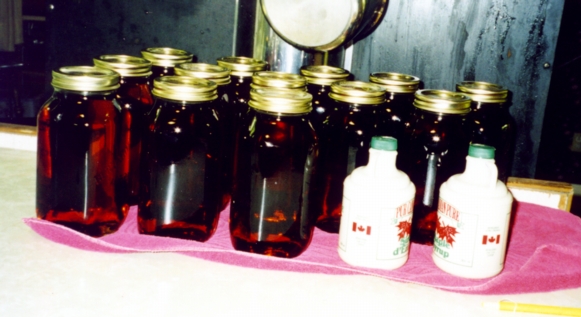
We keep a record of each day's bottling in our farm diary and code each bottle with a batch date. For example, syrup bottled on February 28, 2004 would have a batch number of 2804. If by chance we were bottling on March 28 we might use 32804.
We use a grading set to assess the grade of each batch. The grading set is a group of small bottles with standardized coloured liquid in each one. The syrup is poured into the empty bottle of the set and compared to the others. For our own consumption, we like our syrup to be dark - I like to at least see my syrup on my waffles - and all the Canada #1 grades are very light coloured. Our preference, Canada #2, Amber, possibly leaves the impression (#1 is better than #2) that it is substandard, an unfortunate consequence of our grading system.